Step 1: Creating the Shell (App Settings) [KOBIL Docs]
1. Access App Settings
- Log into the KOBIL Portal
- In the top navigation bar/header, click on the App Settings tab
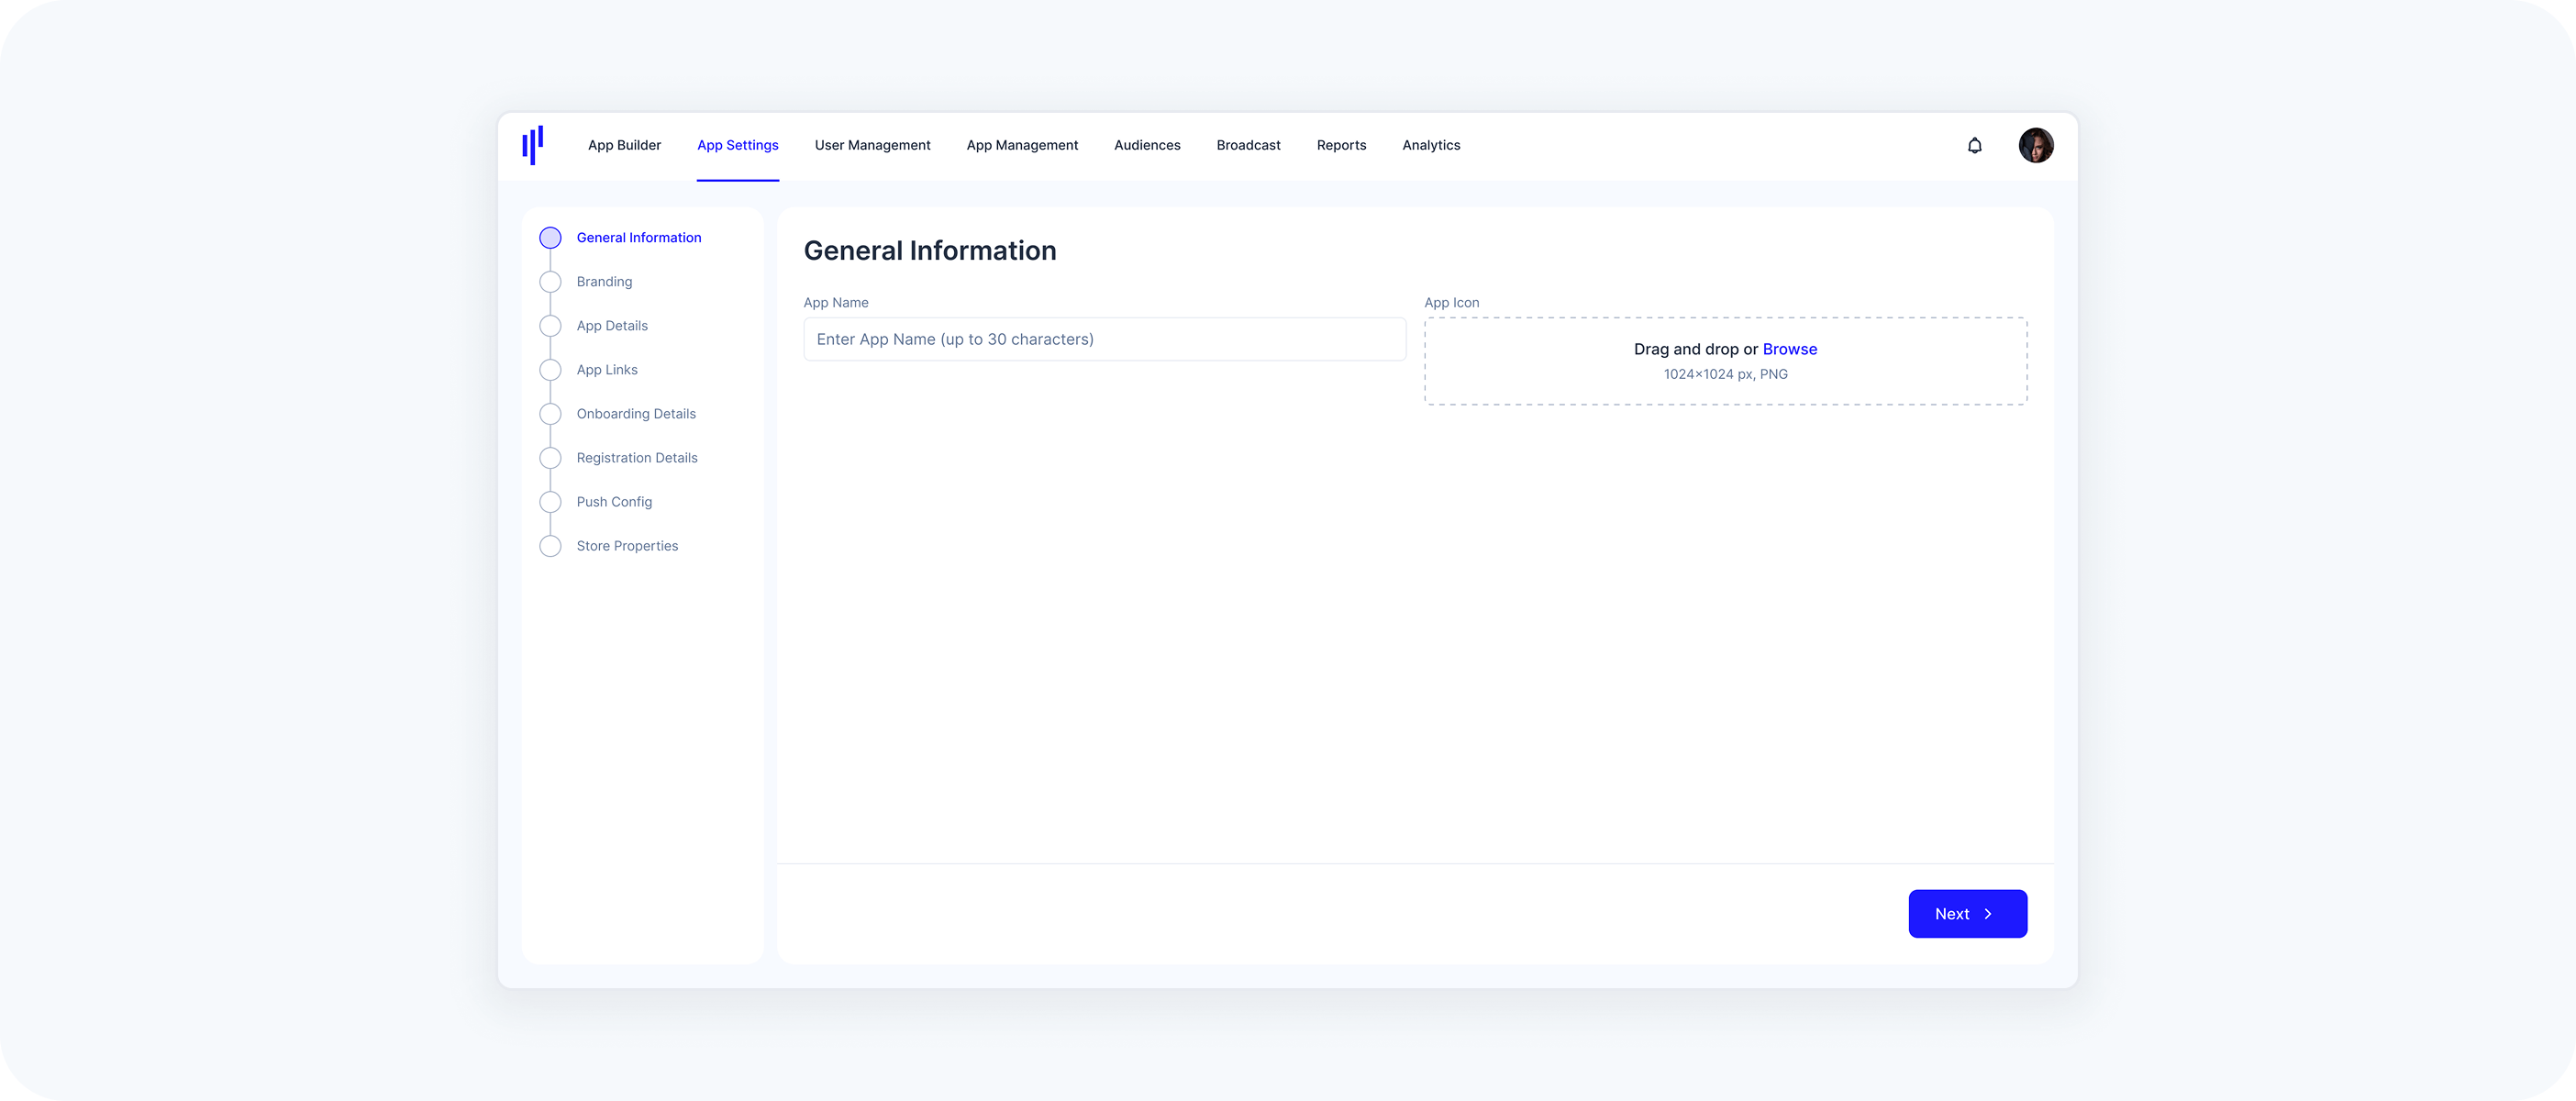
2. Fill Out General Information
These settings define how your app appears to users and in app stores:
- App Name
- Max 30 characters
Choose a clear, memorable, and brand-aligned name
- App Icon
- PNG format only
- Size: 1024 x 1024 px
Use clean, simple graphics (avoid detailed photos)
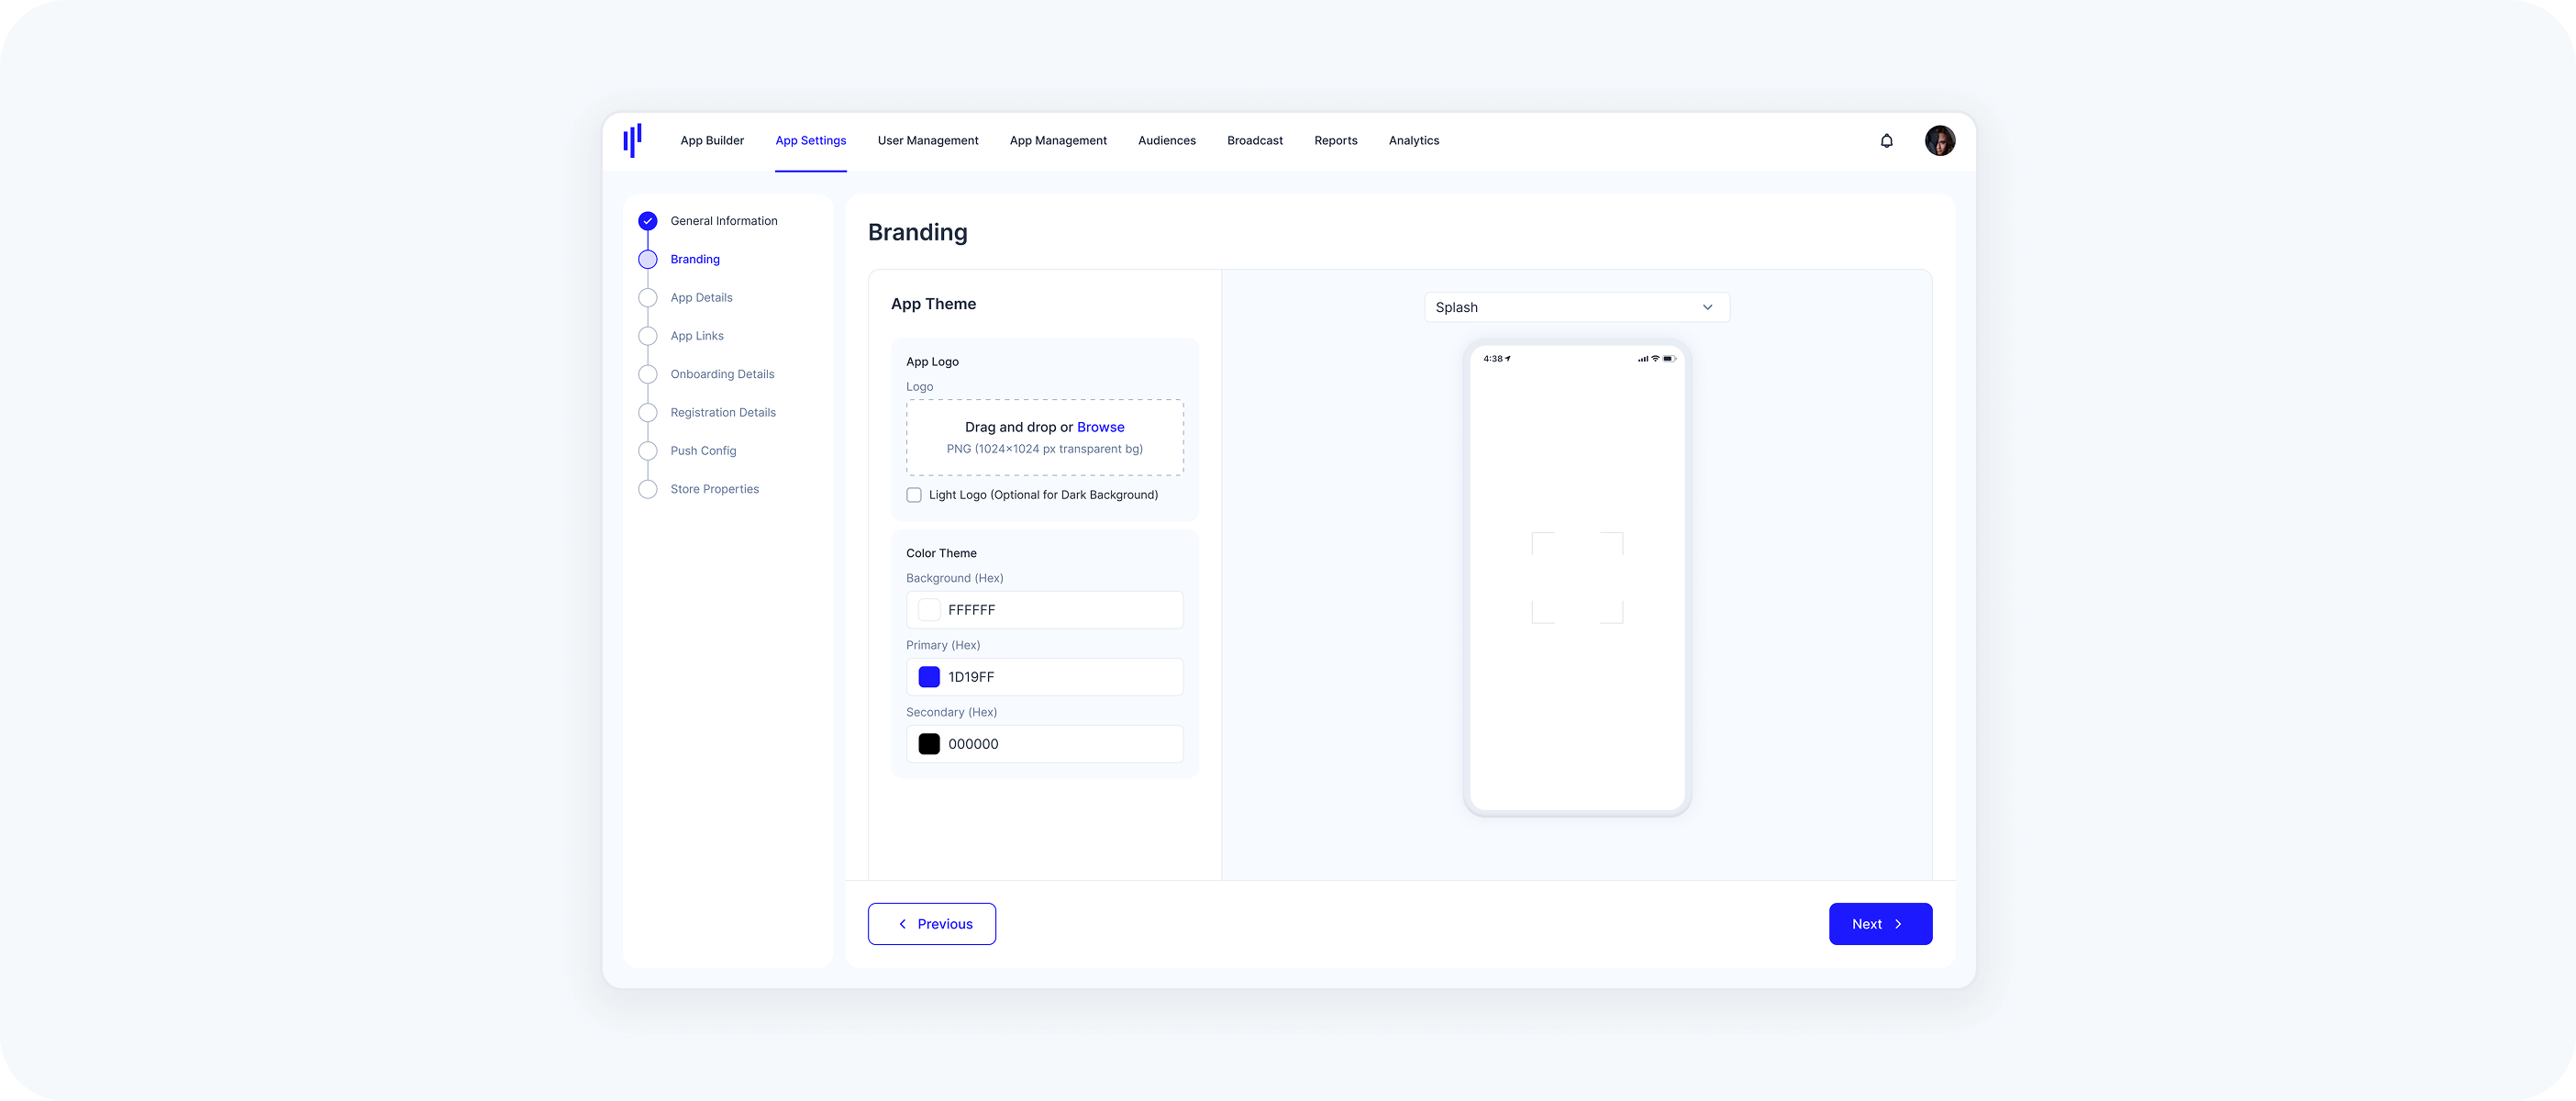
3. Set Branding
Establish a consistent visual identity for your app:
- App Logo
Upload a primary logo (PNG, 1024x1024, transparent background)
- Optionally upload a light logo
The light logo replaces the main logo on dark backgrounds (except on the splash screen)
- Color Theme
- Enter HEX codes for:
- Background color (e.g., #FFFFFF)
- Primary color (e.g., links and icons)
Secondary color (e.g., buttons, highlights)
As you update colors and logos, a Live Preview lets you see changes across screens like Login, Home, Chat, Pay, and Profile.
4. Configure App Details (Navigation Tab Configuration)
In this section, you can configure the bottom navigation bar of your SuperApp. By default, the app includes five standard tabs: Home, Chat, QR Scan, Pay and Profile. You can customize these tabs to fit your use case and branding:
- Customize Default Tabs
Disable/Hide Tabs
You can disable or hide any of the default tabs — except Profile, which is required.
For example:Disable Wallet if you're using your own wallet solution
- Remove QR Scan if not needed
- Add Custom Tabs
Add up to 3 custom tabs to extend the navigation bar (this number increases if you disable default tabs)
- You can have a maximum of 8 tabs in total
Each custom tab can link to one of your services, a specific component, or a webview
Use the Live Preview to see how your changes will look and behave before publishing.

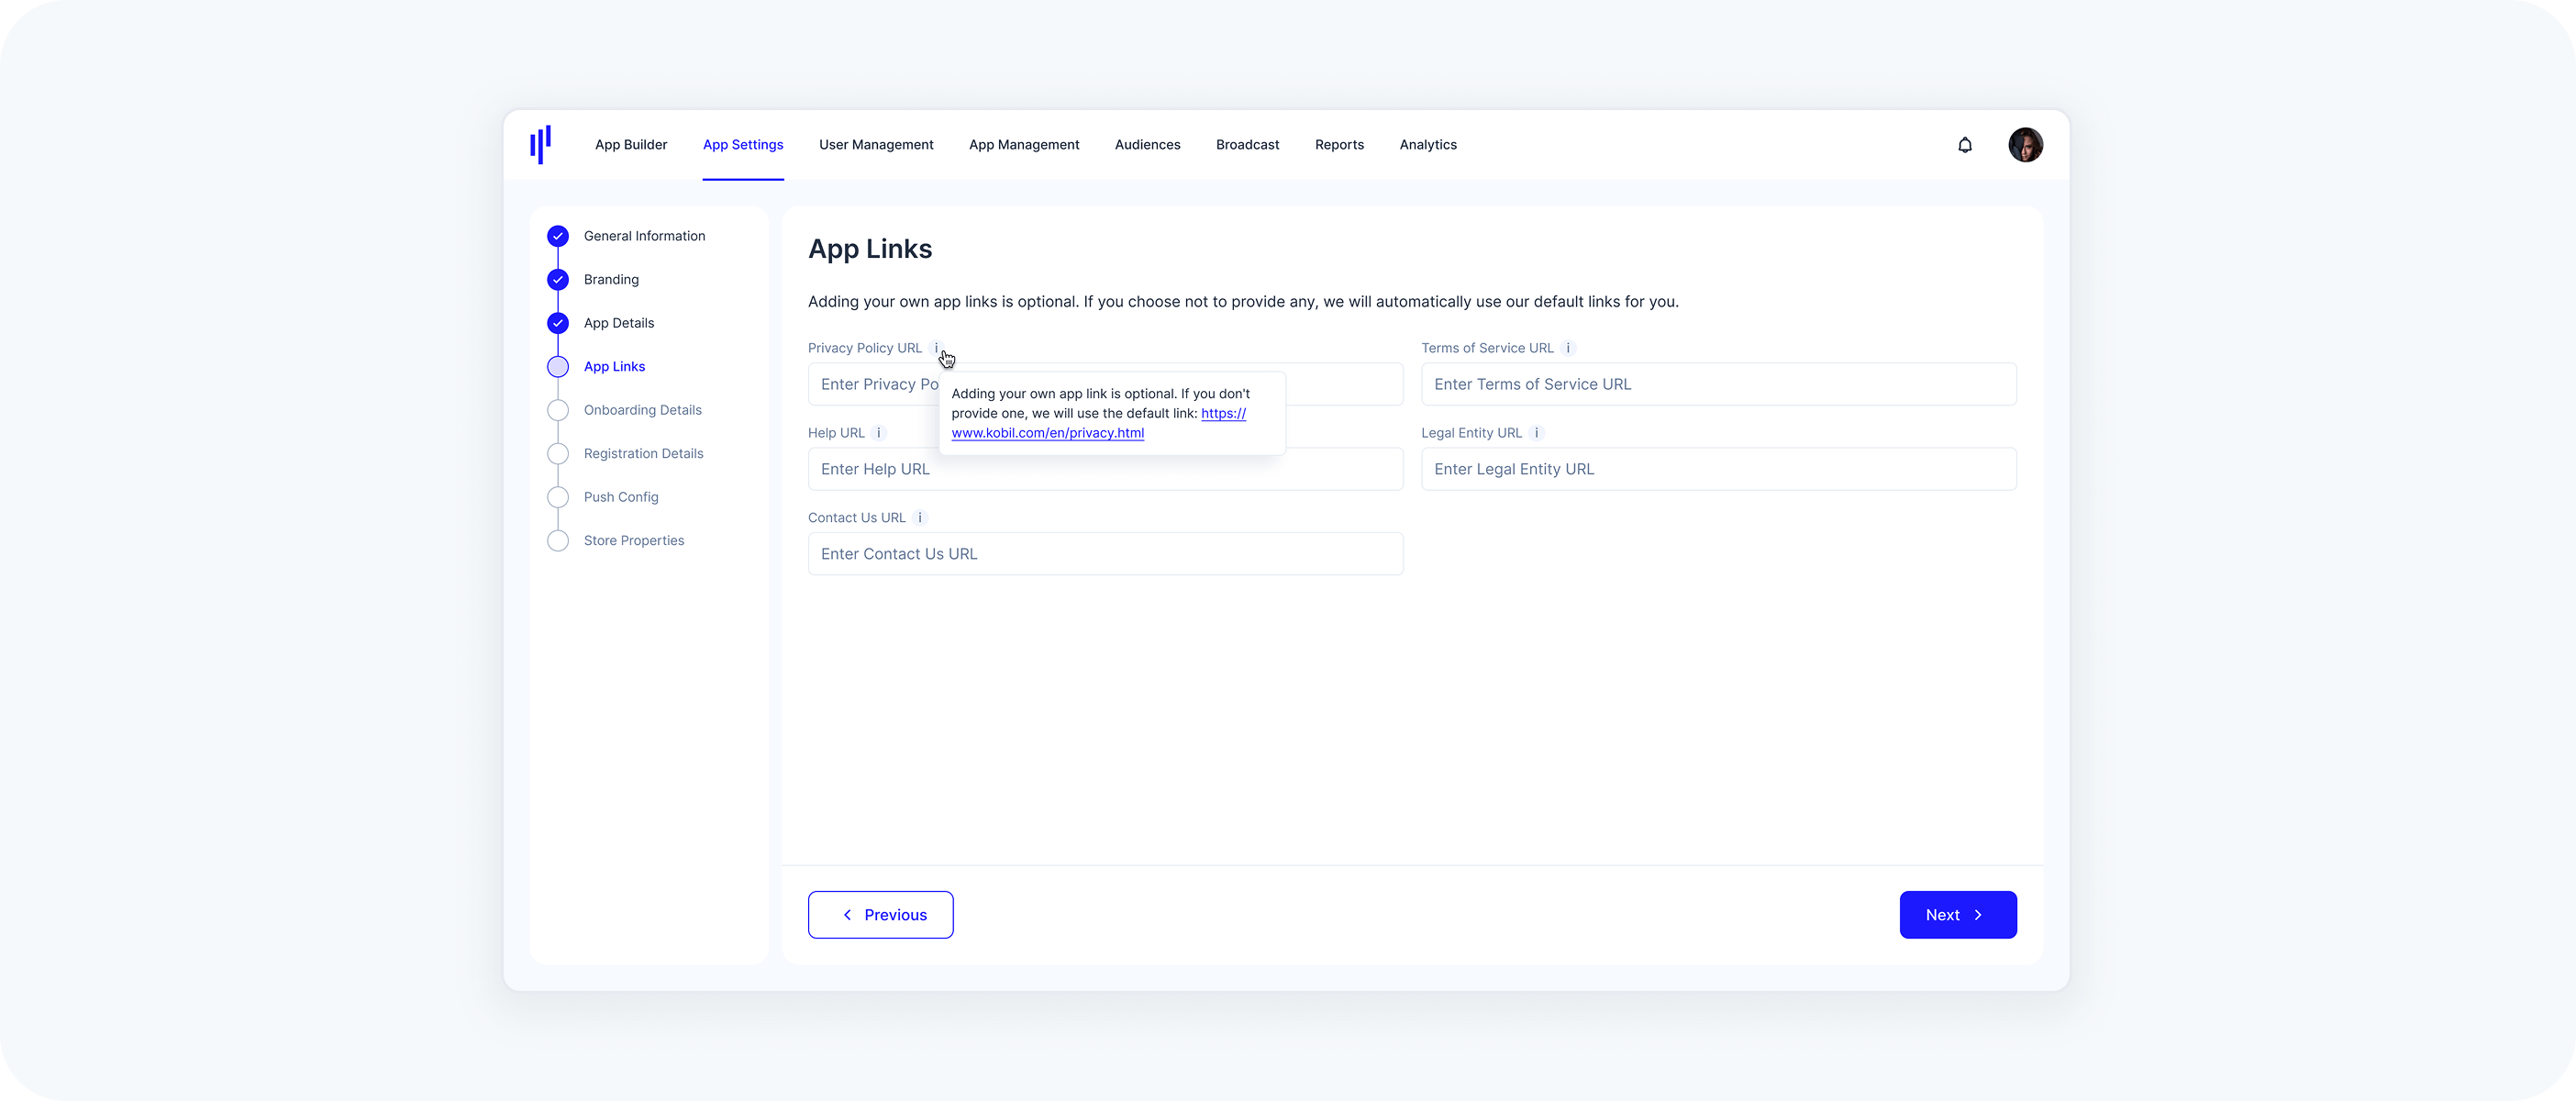
5. Add App Links (Optional)
Link to external pages that support transparency, compliance, and user support:
- Privacy Policy
- Terms of Service
- Help or Support
- Contact Us
- Legal Entity Information
If left empty, KOBIL’s default URLs will be used.
6. Configure Onboarding Details
Define how users are introduced to the app when they open it for the first time.
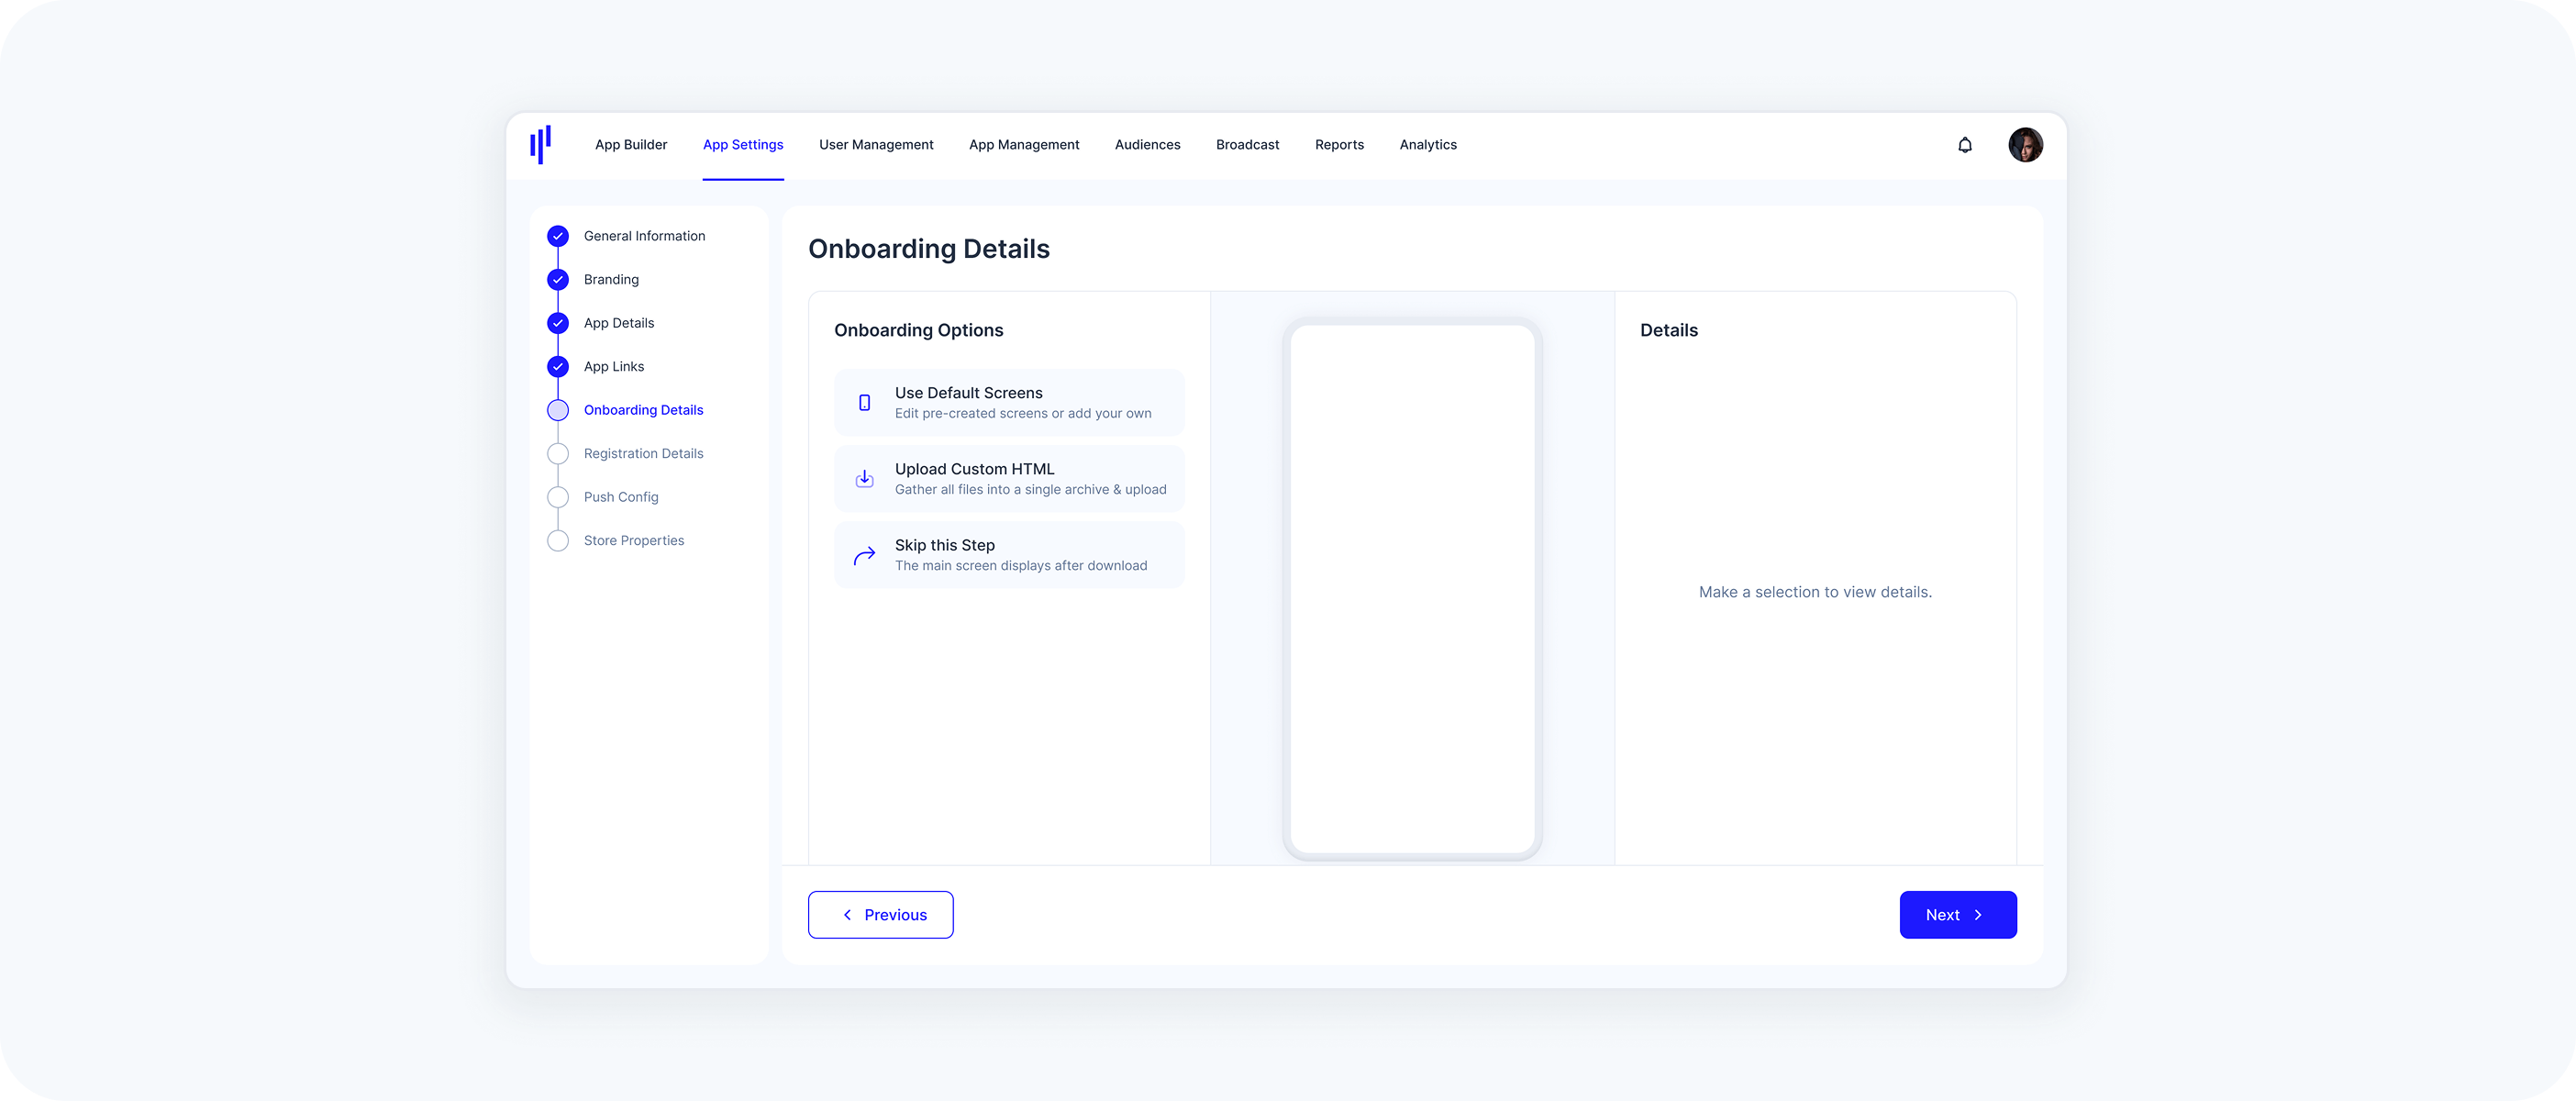
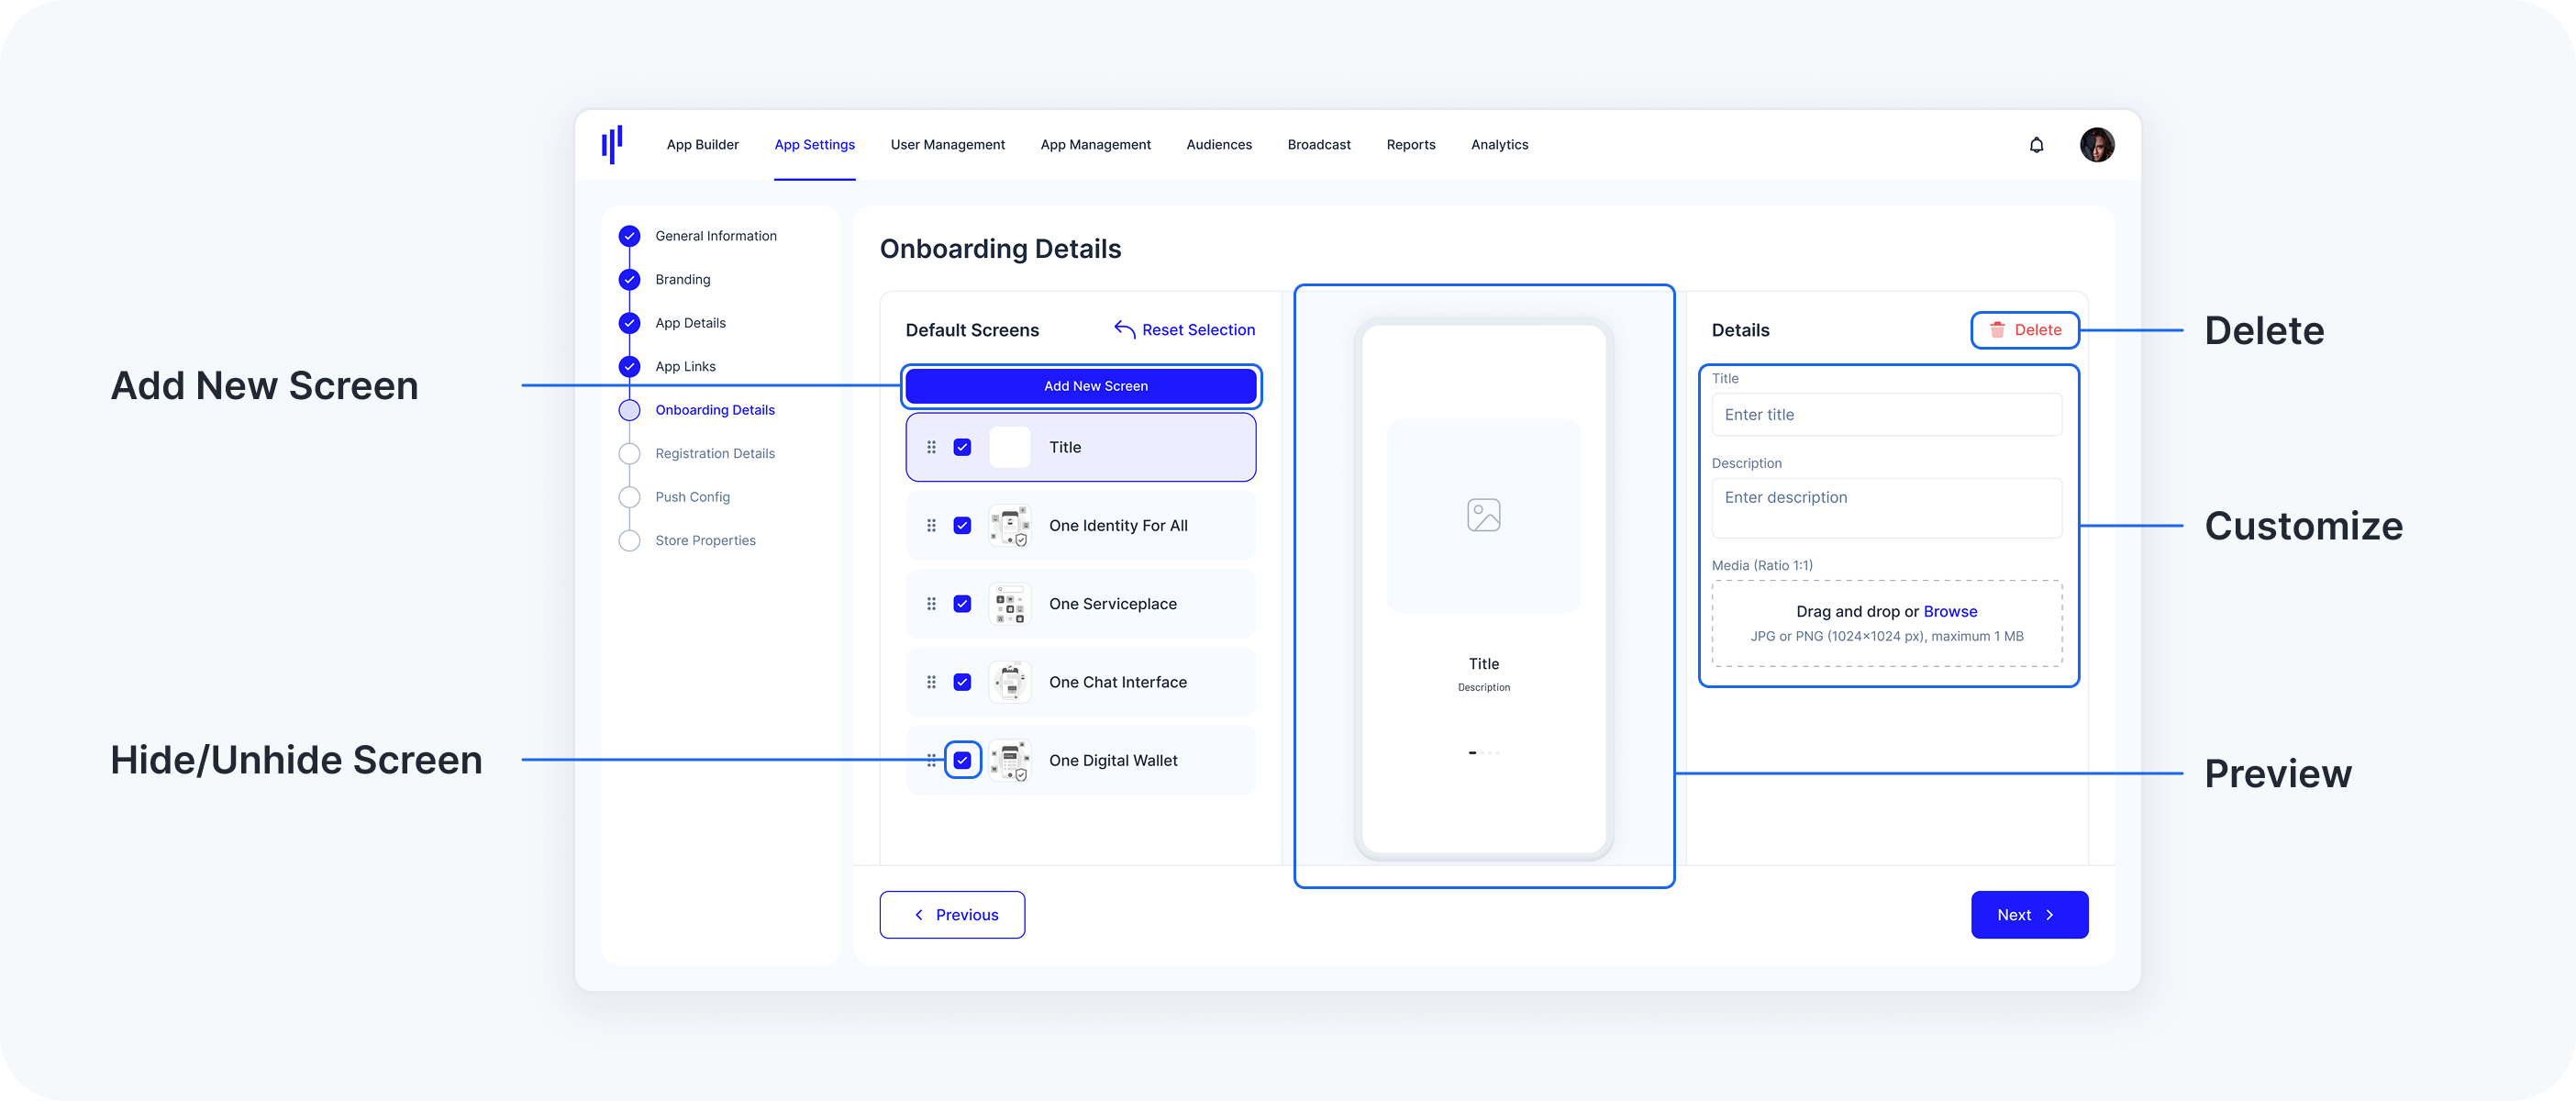
- Option 1: Use Default Screens
The Default Onboarding Screens provide a ready-to-use flow that you can easily personalize. You have the flexibility to add, remove, and modify screens. This option allows you to personalize the content for your users while maintaining a structured onboarding process.
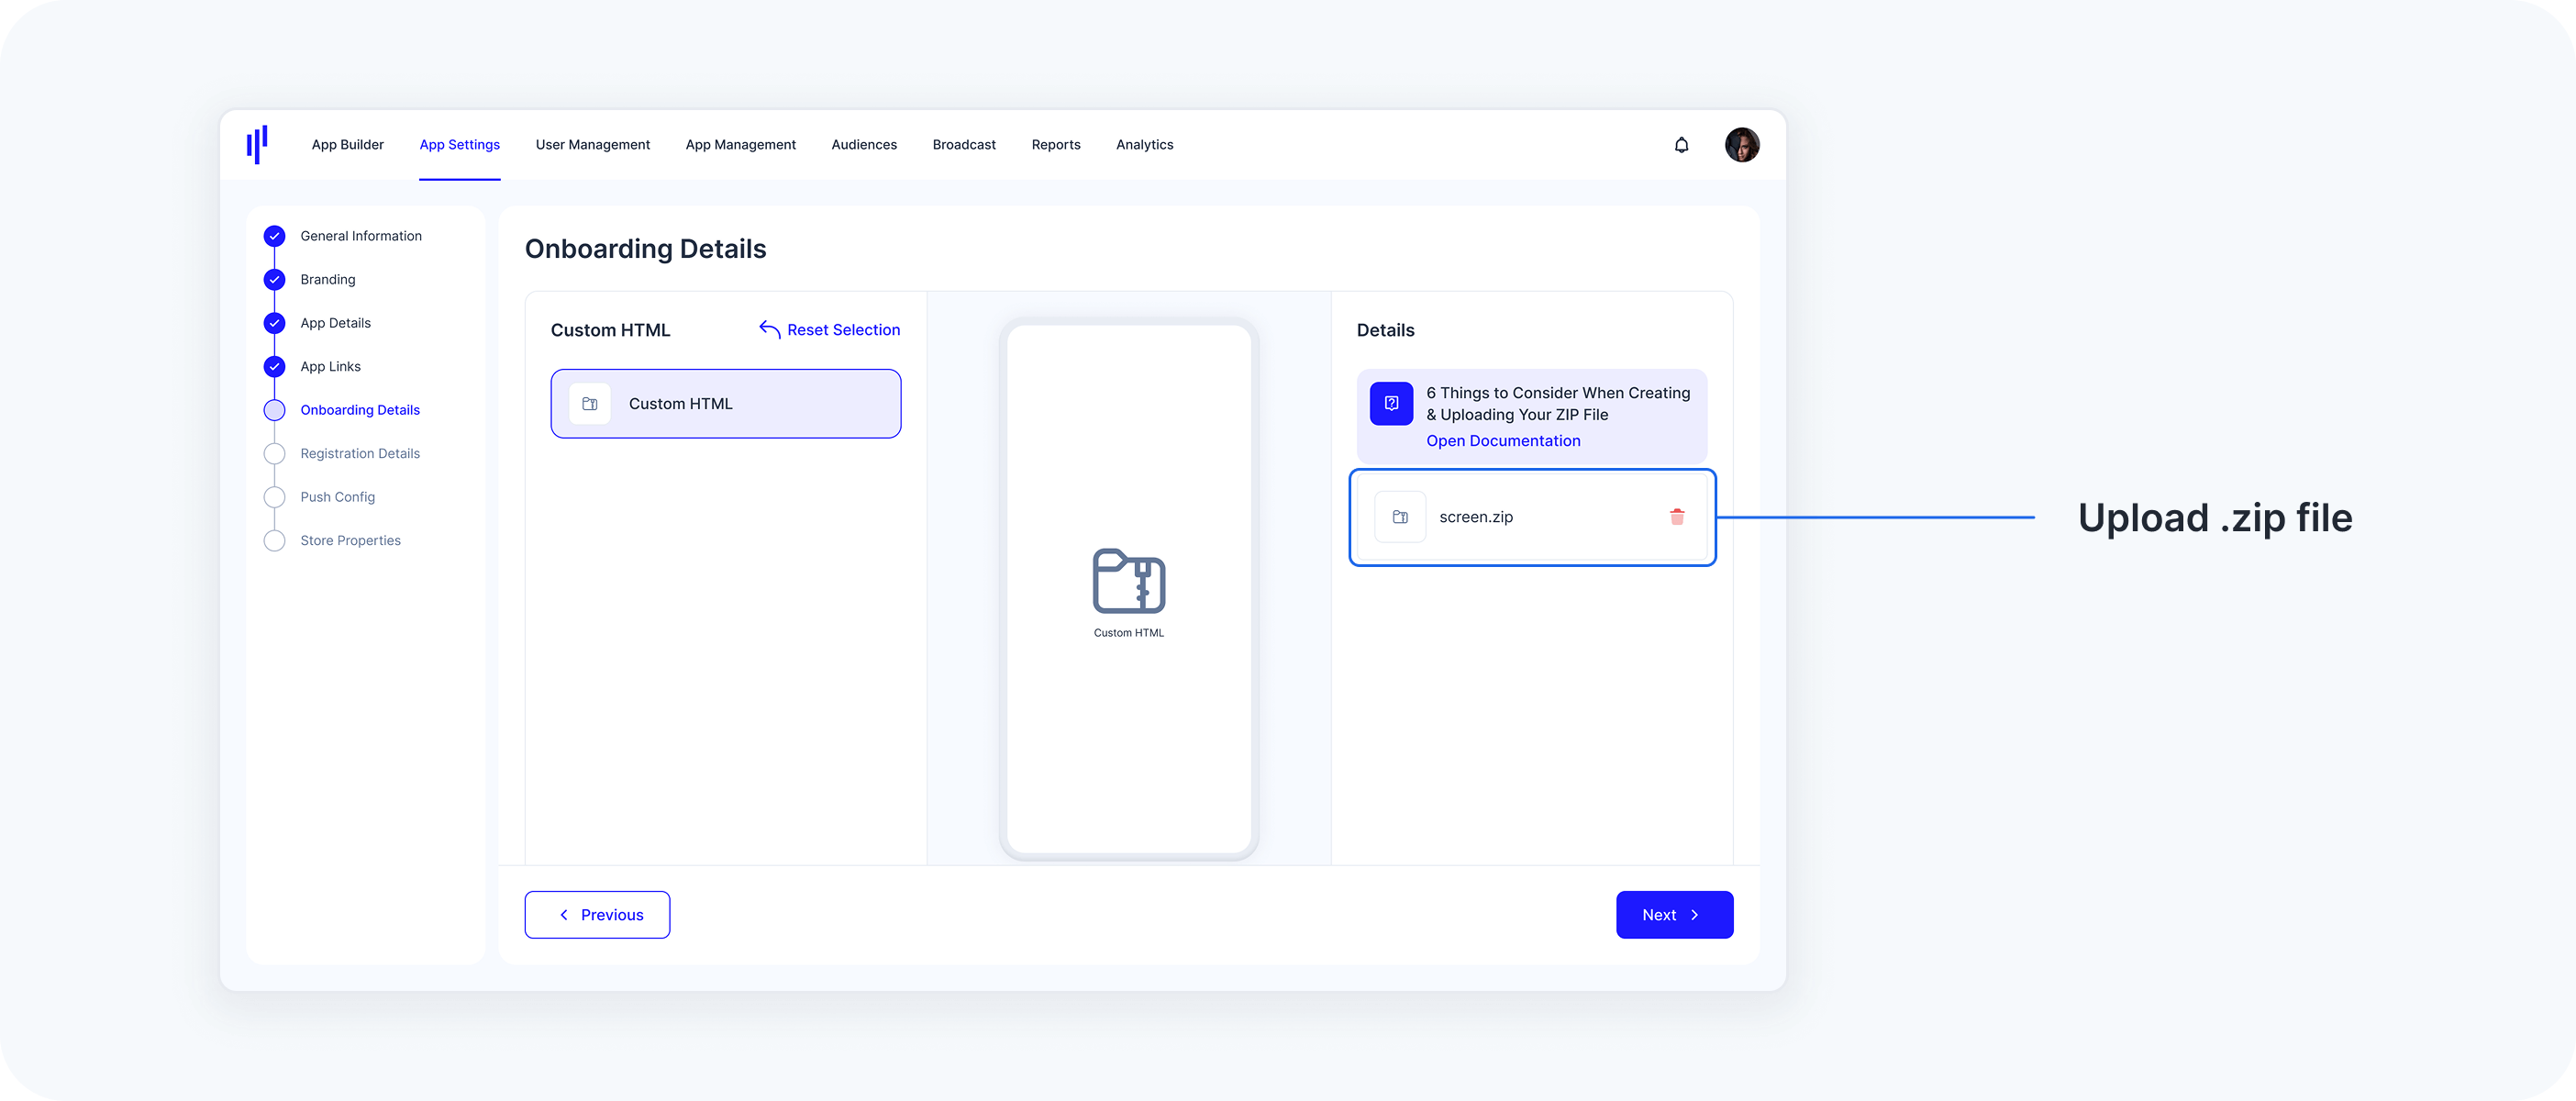
- Option 2: Upload Custom HTML (Advanced)
For complete creative control, you can upload your own custom onboarding screens in the form of HTML content. This option allows you to design a fully customized flow, giving you the freedom to implement unique layouts, styles, and interactive elements.
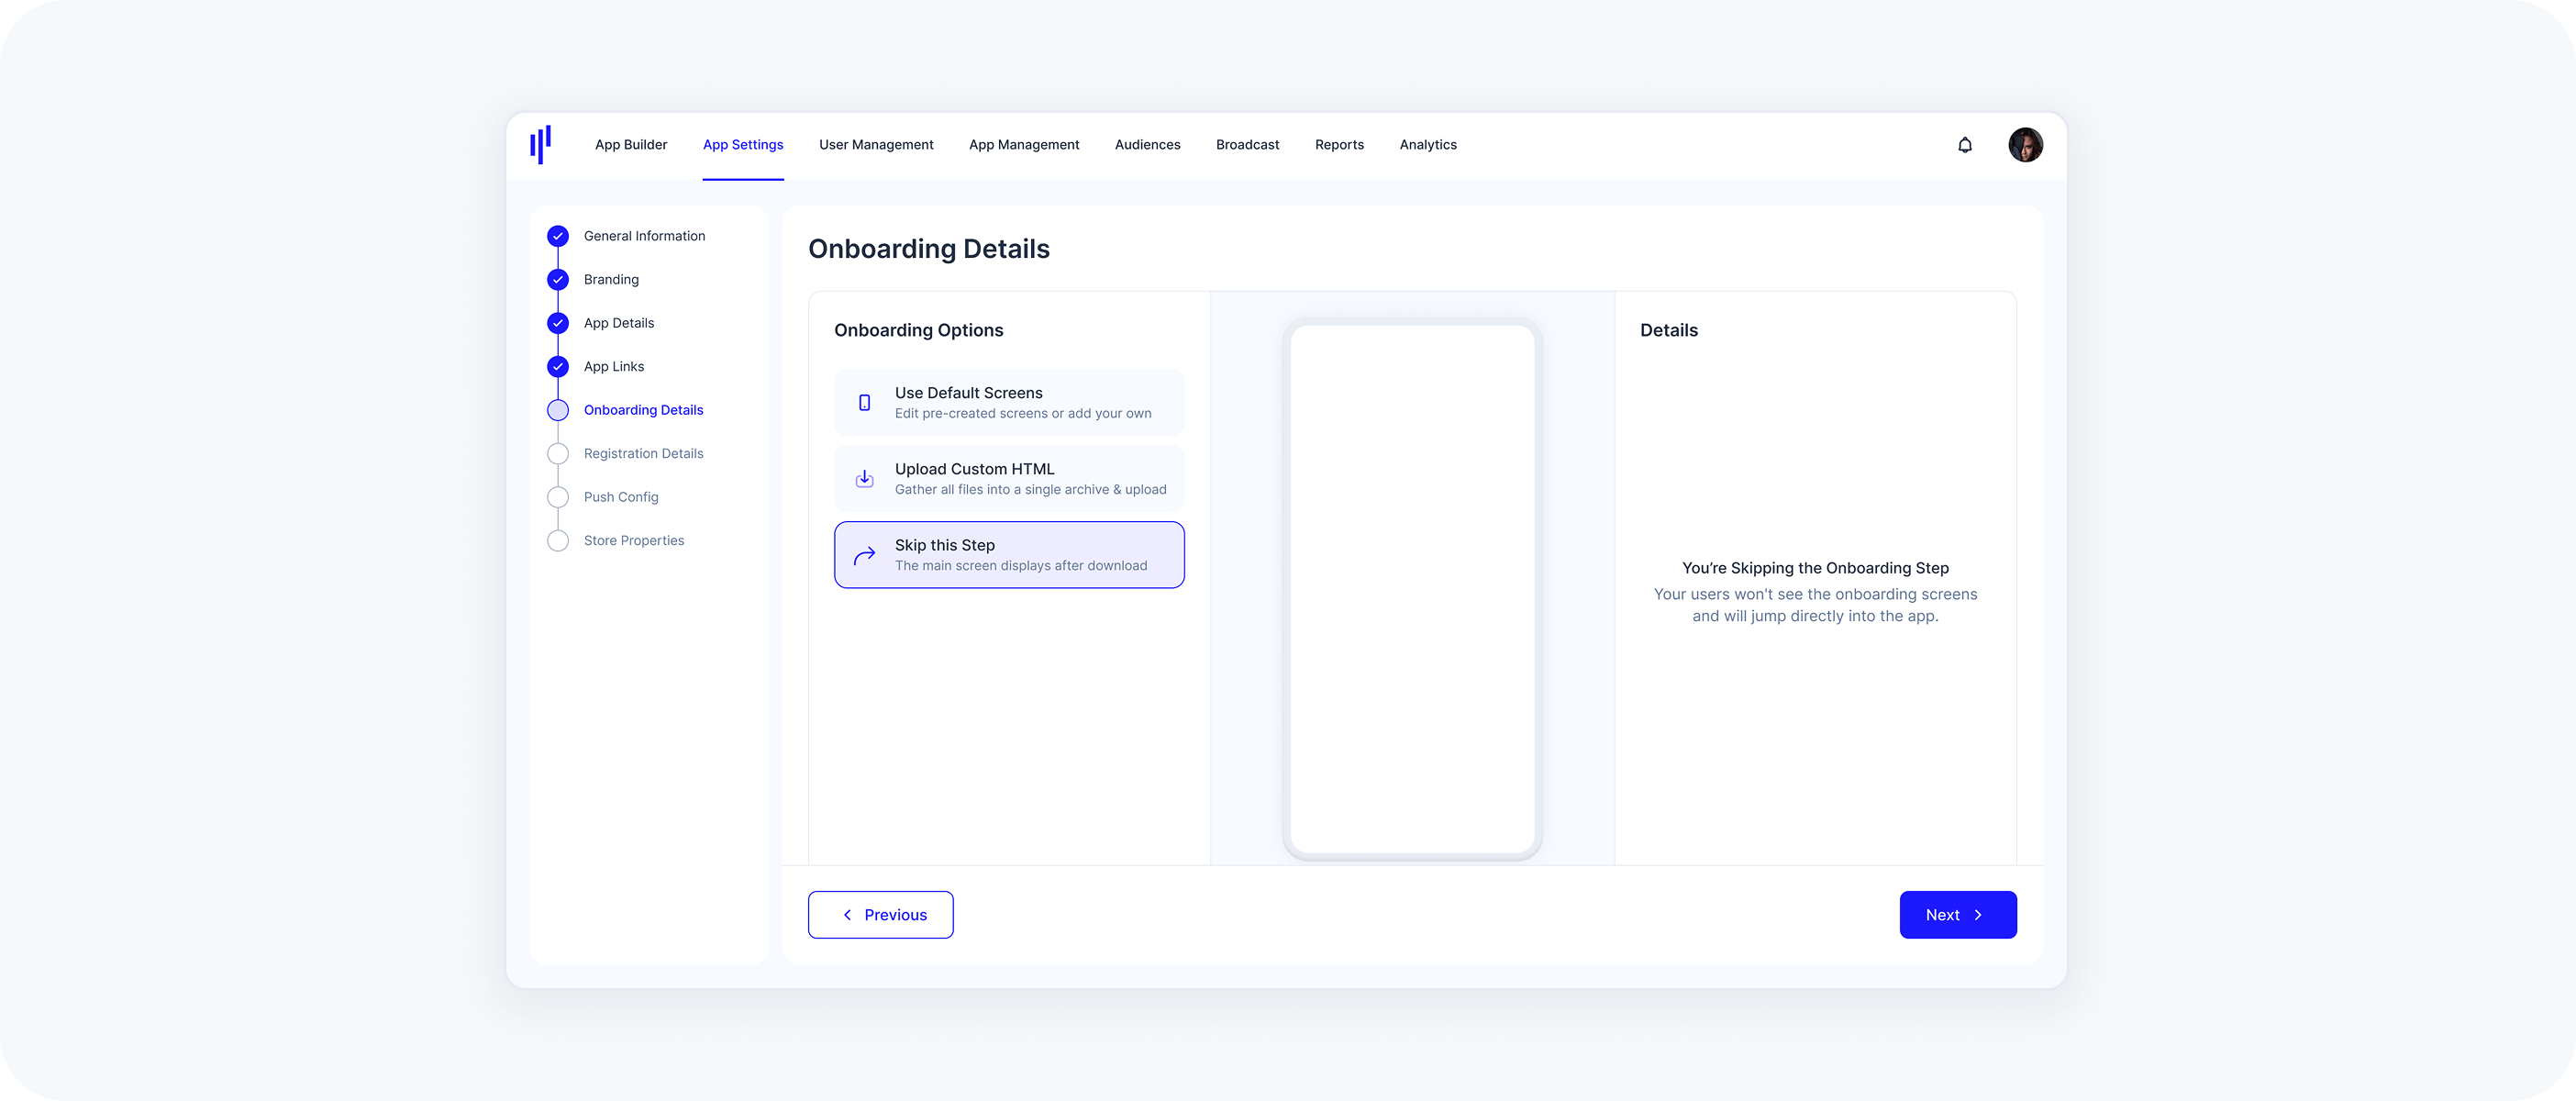
- Option 3: Skip the Onboarding Process
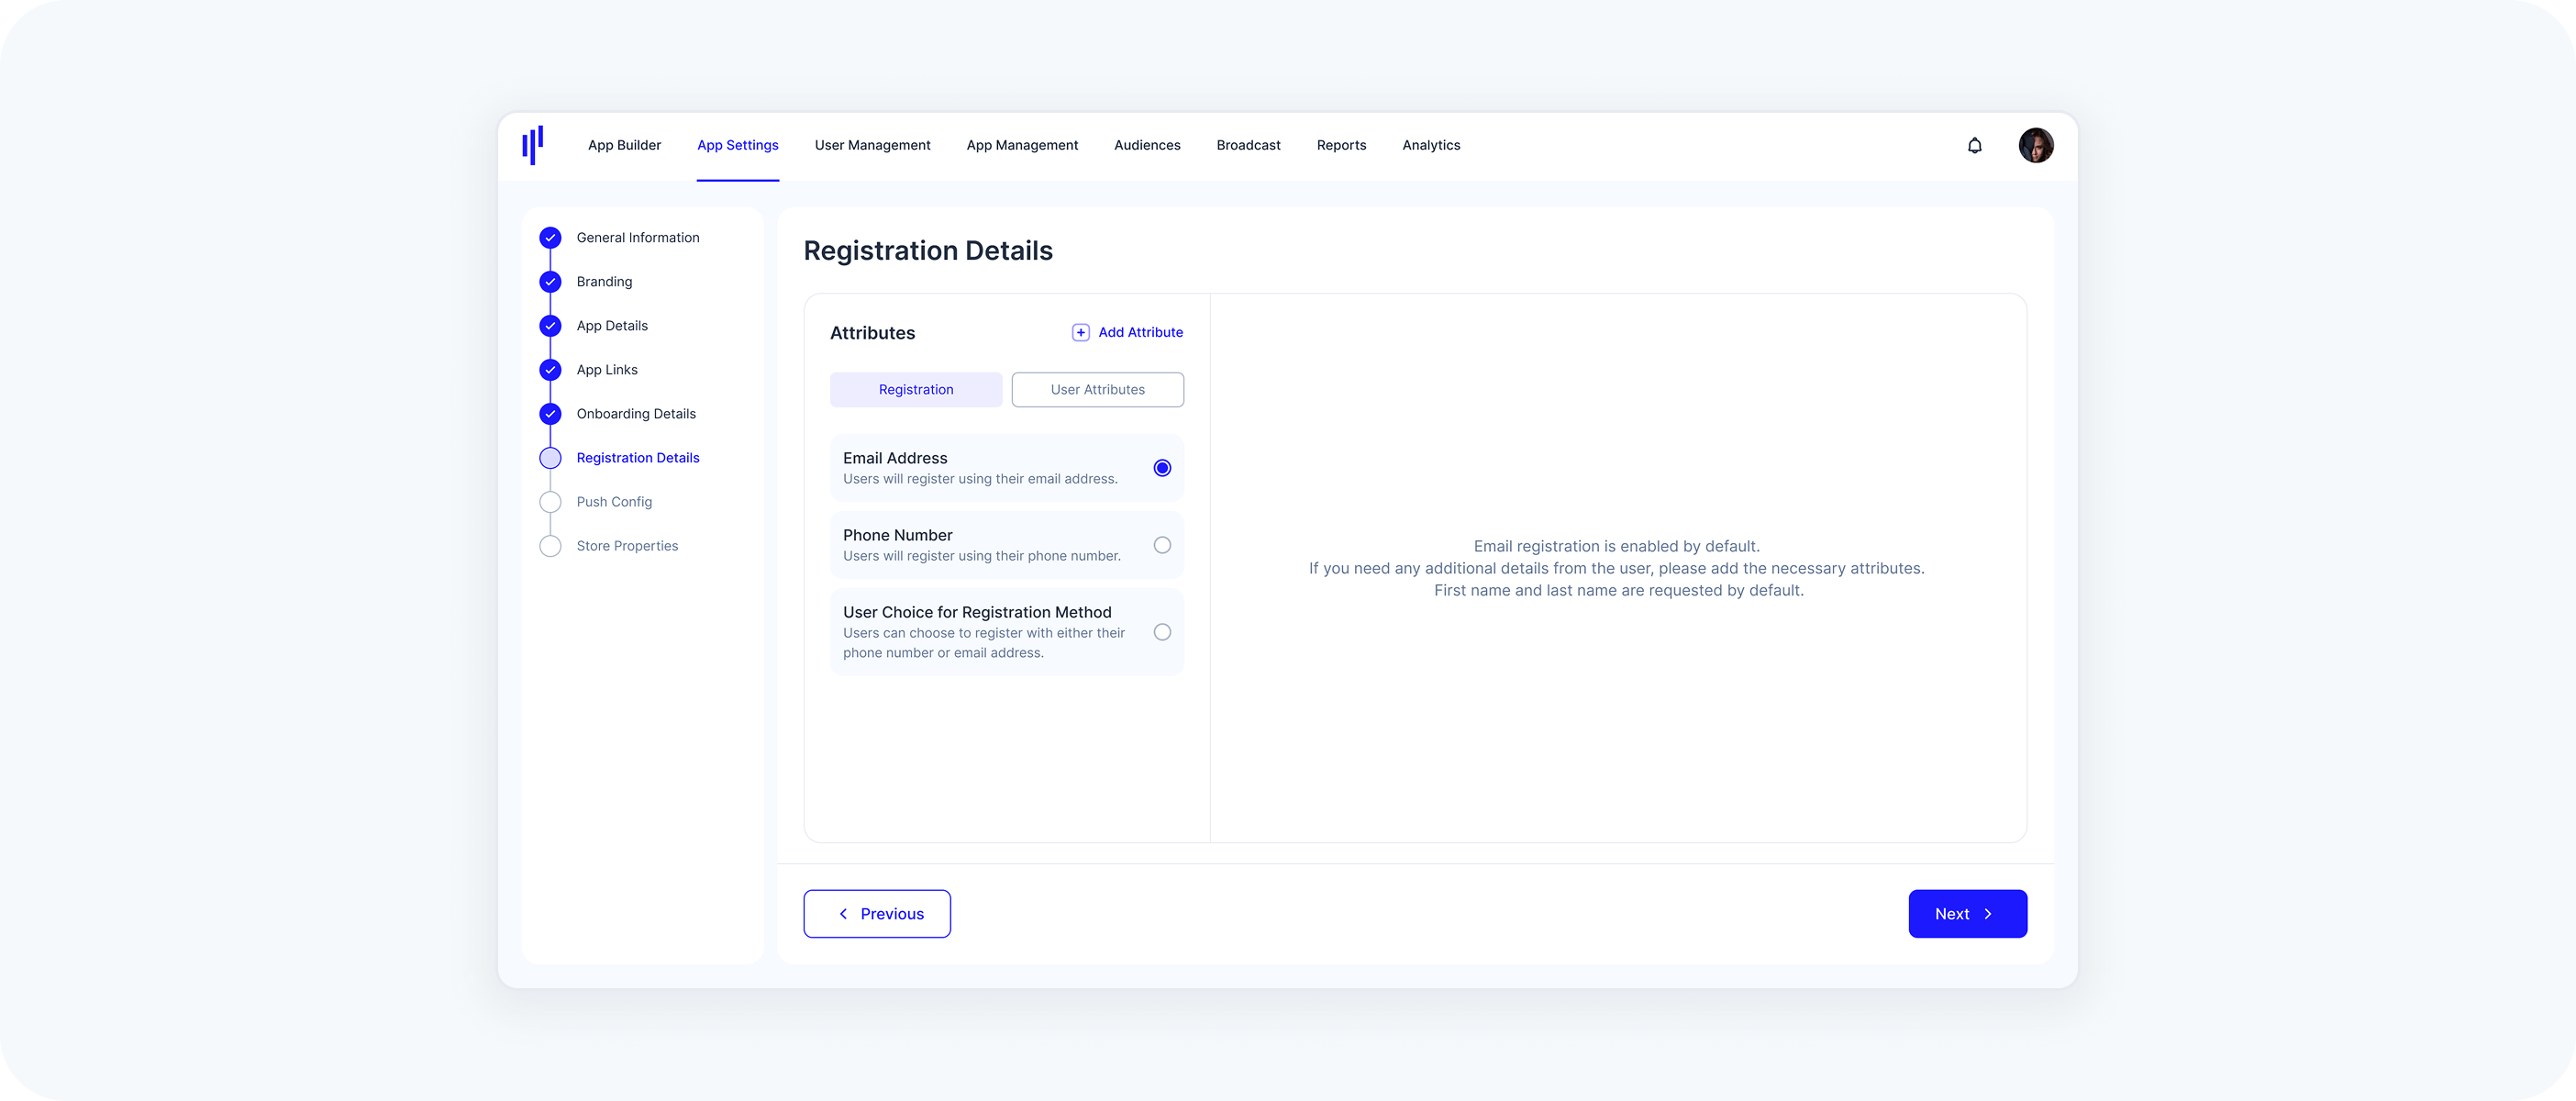
7. Configure Registration Details (Not Production Ready)
In this section, you configure how users will register for your SuperApp and define which user attributes are collected during the registration process.
Select a Registration Method (Choose how users can create their accounts):
- Email Address (Default) - Users register using their email
- Phone Number - Users register using their mobile number
- User Choice for Registration Method - Users can choose either email or phone number to register This selection defines the primary identifier used for login and authentication in your app.
Define User Attributes (You can also specify what additional information should be collected during registration).
- Default fields: First Name & Last Name
Optional custom fields, add any other attributes your app may require, such as:
- Date of Birth
- Address
- Country
- Company Name
- Custom consent flags or preferences
Make sure the attributes align with your use case and comply with privacy regulations.
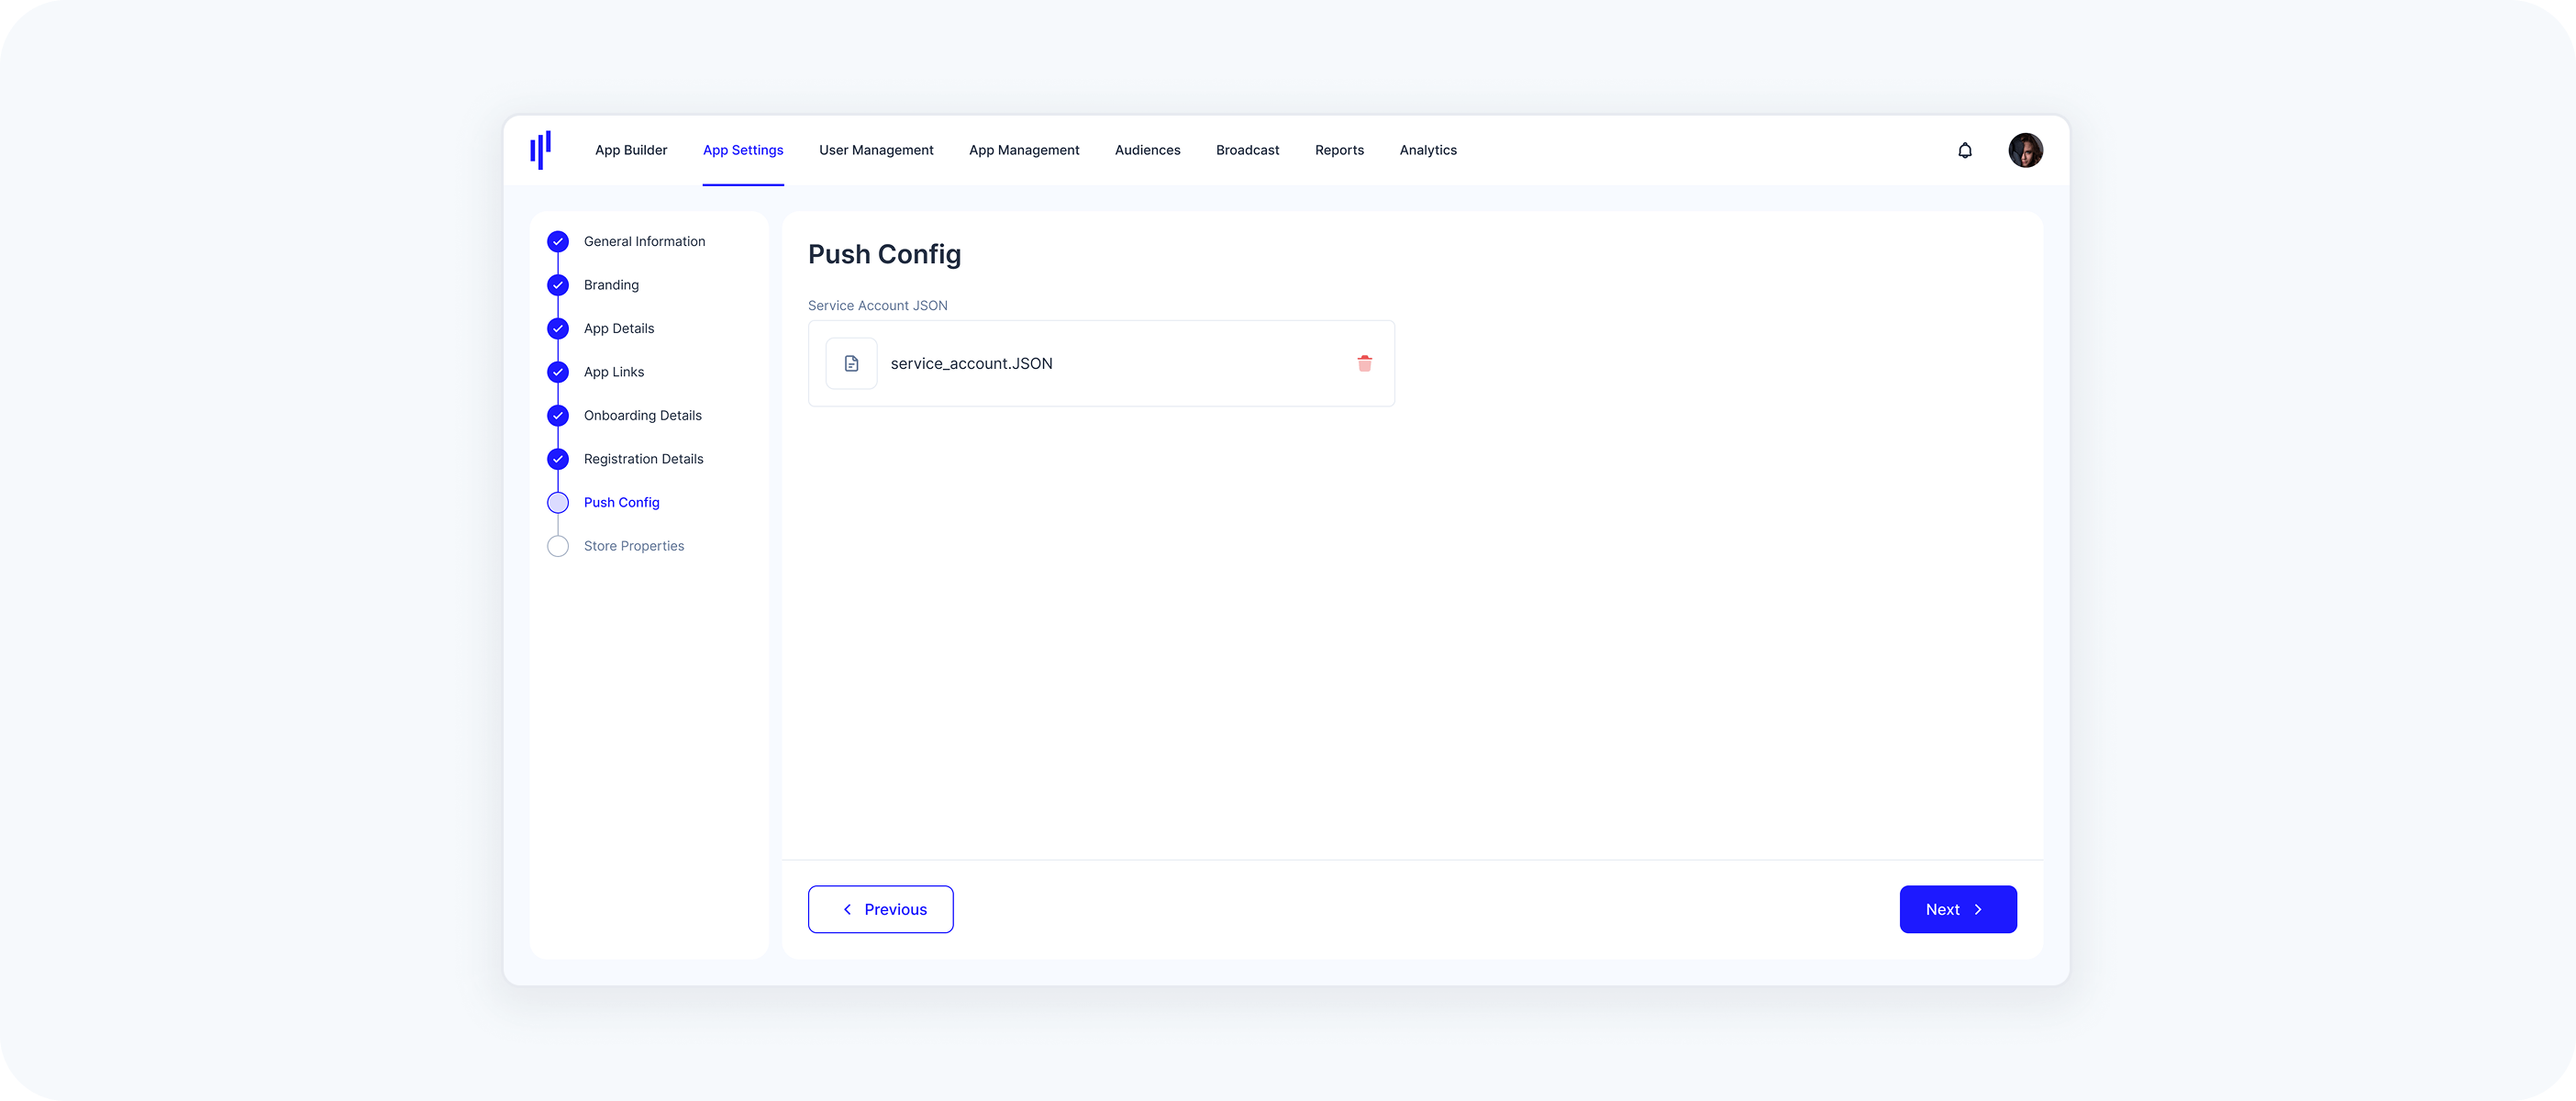
8. Push Config
Configuring Push Notifications is optional, during SuperApp creation. If you choose not to enable Push Notifications initially, it is important to note that this action is irreversible. To enable Push Notifications later, you would need to create and release a new version of your SuperApp.
- Upload your Google Service Account JSON file
- This enables Firebase Cloud Messaging (FCM)
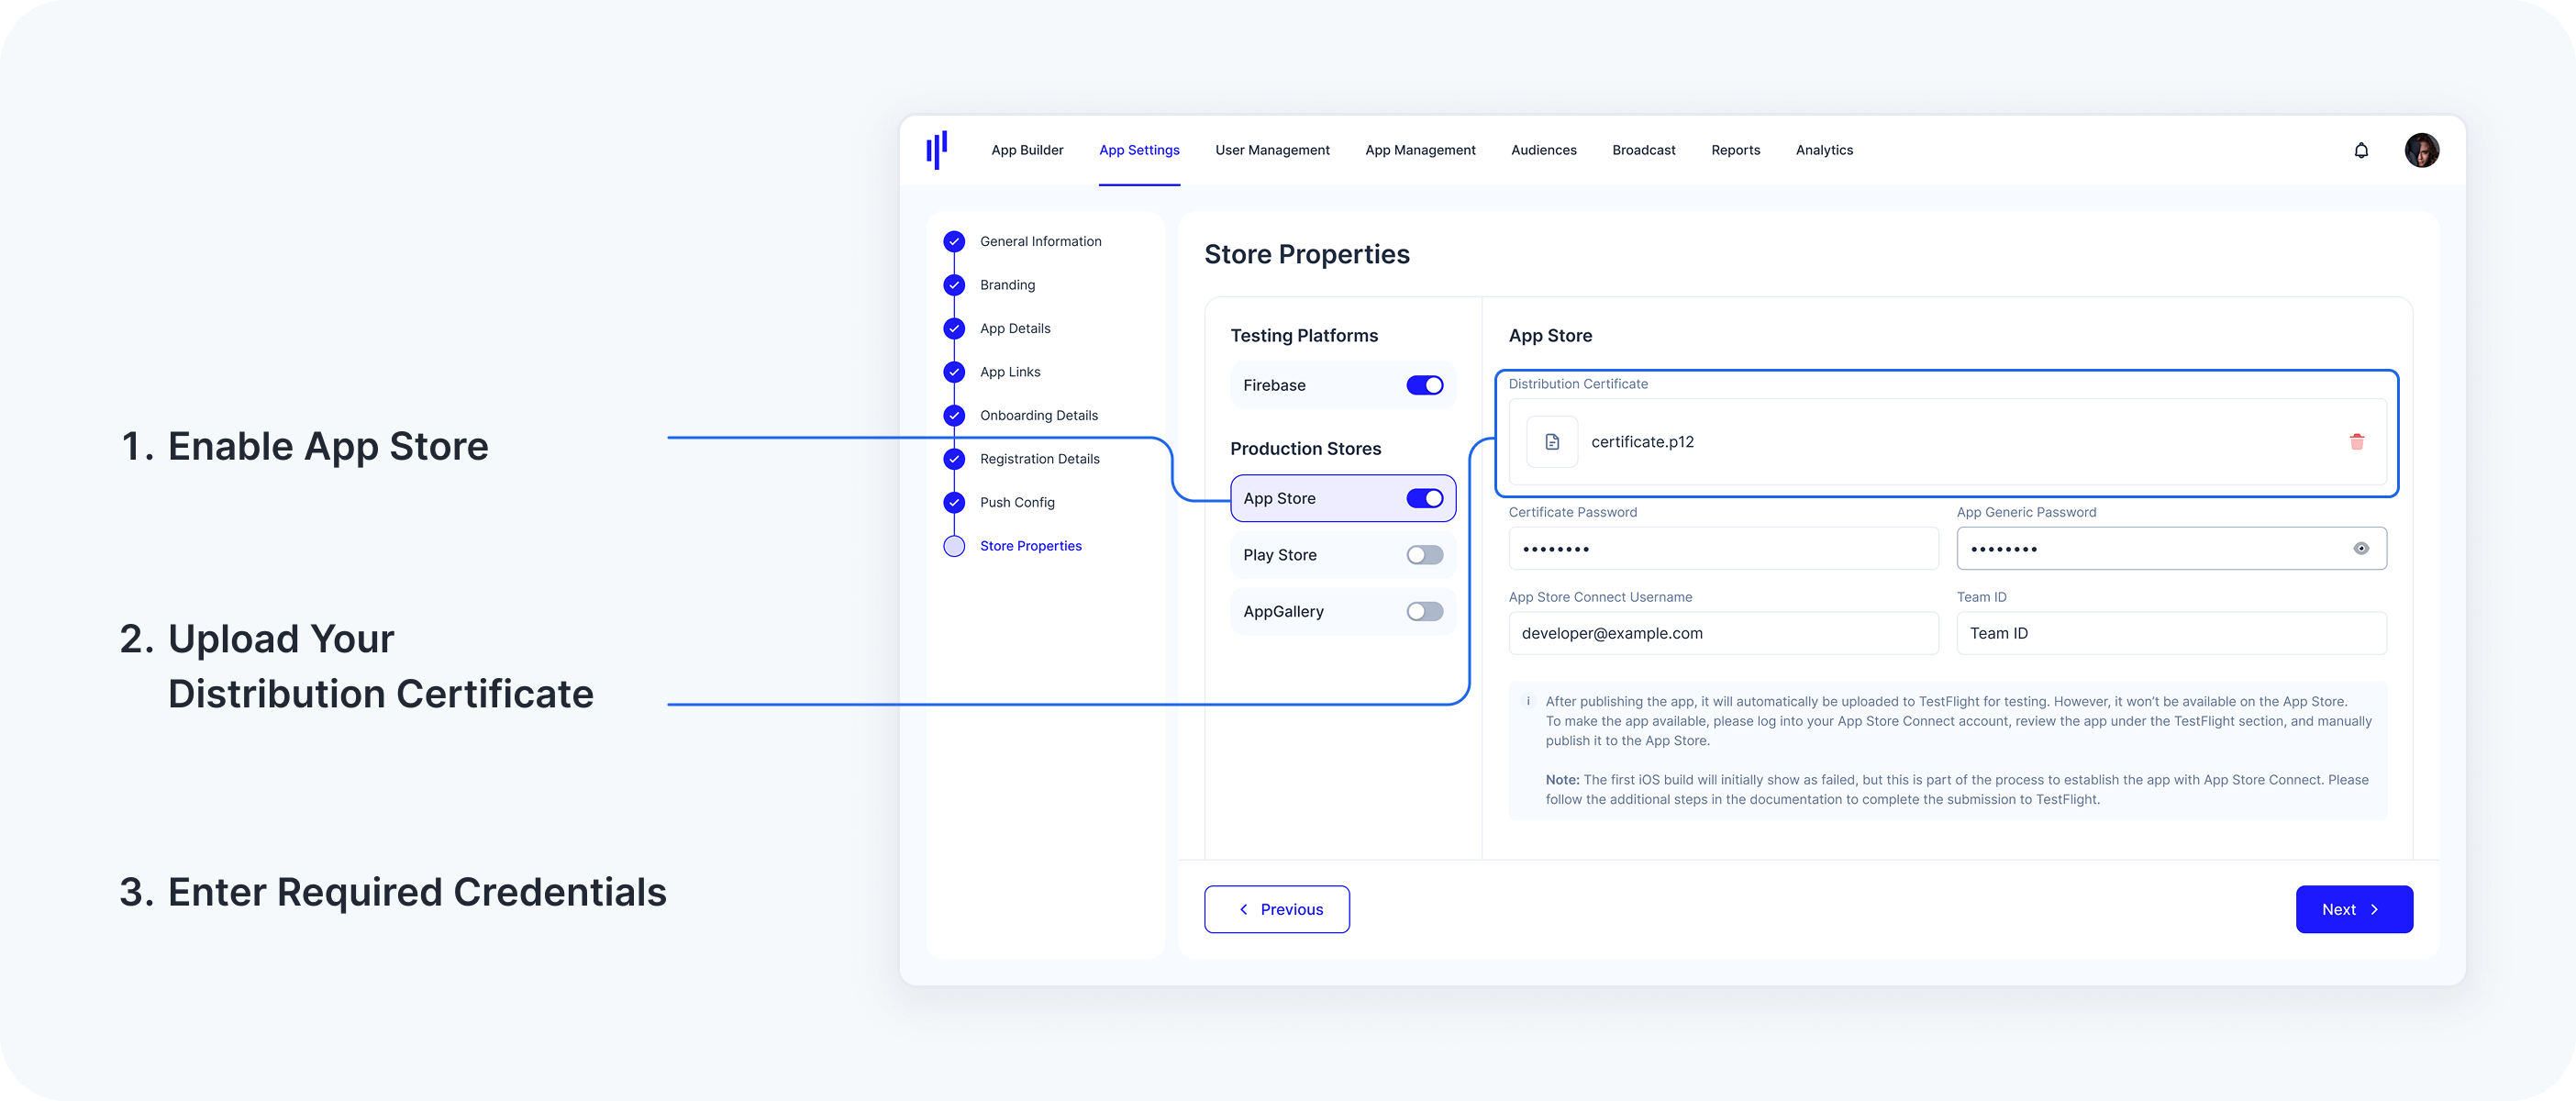
9. Store Properties
Set up your app for distribution on the following platforms:
- Firebase
- App Store
- Play Store
- AppGallery
Each platform setup requires:
- Signing credentials (.keystore or .p12 files)
- App-specific tokens and credentials
- Email addresses for testers (Firebase)
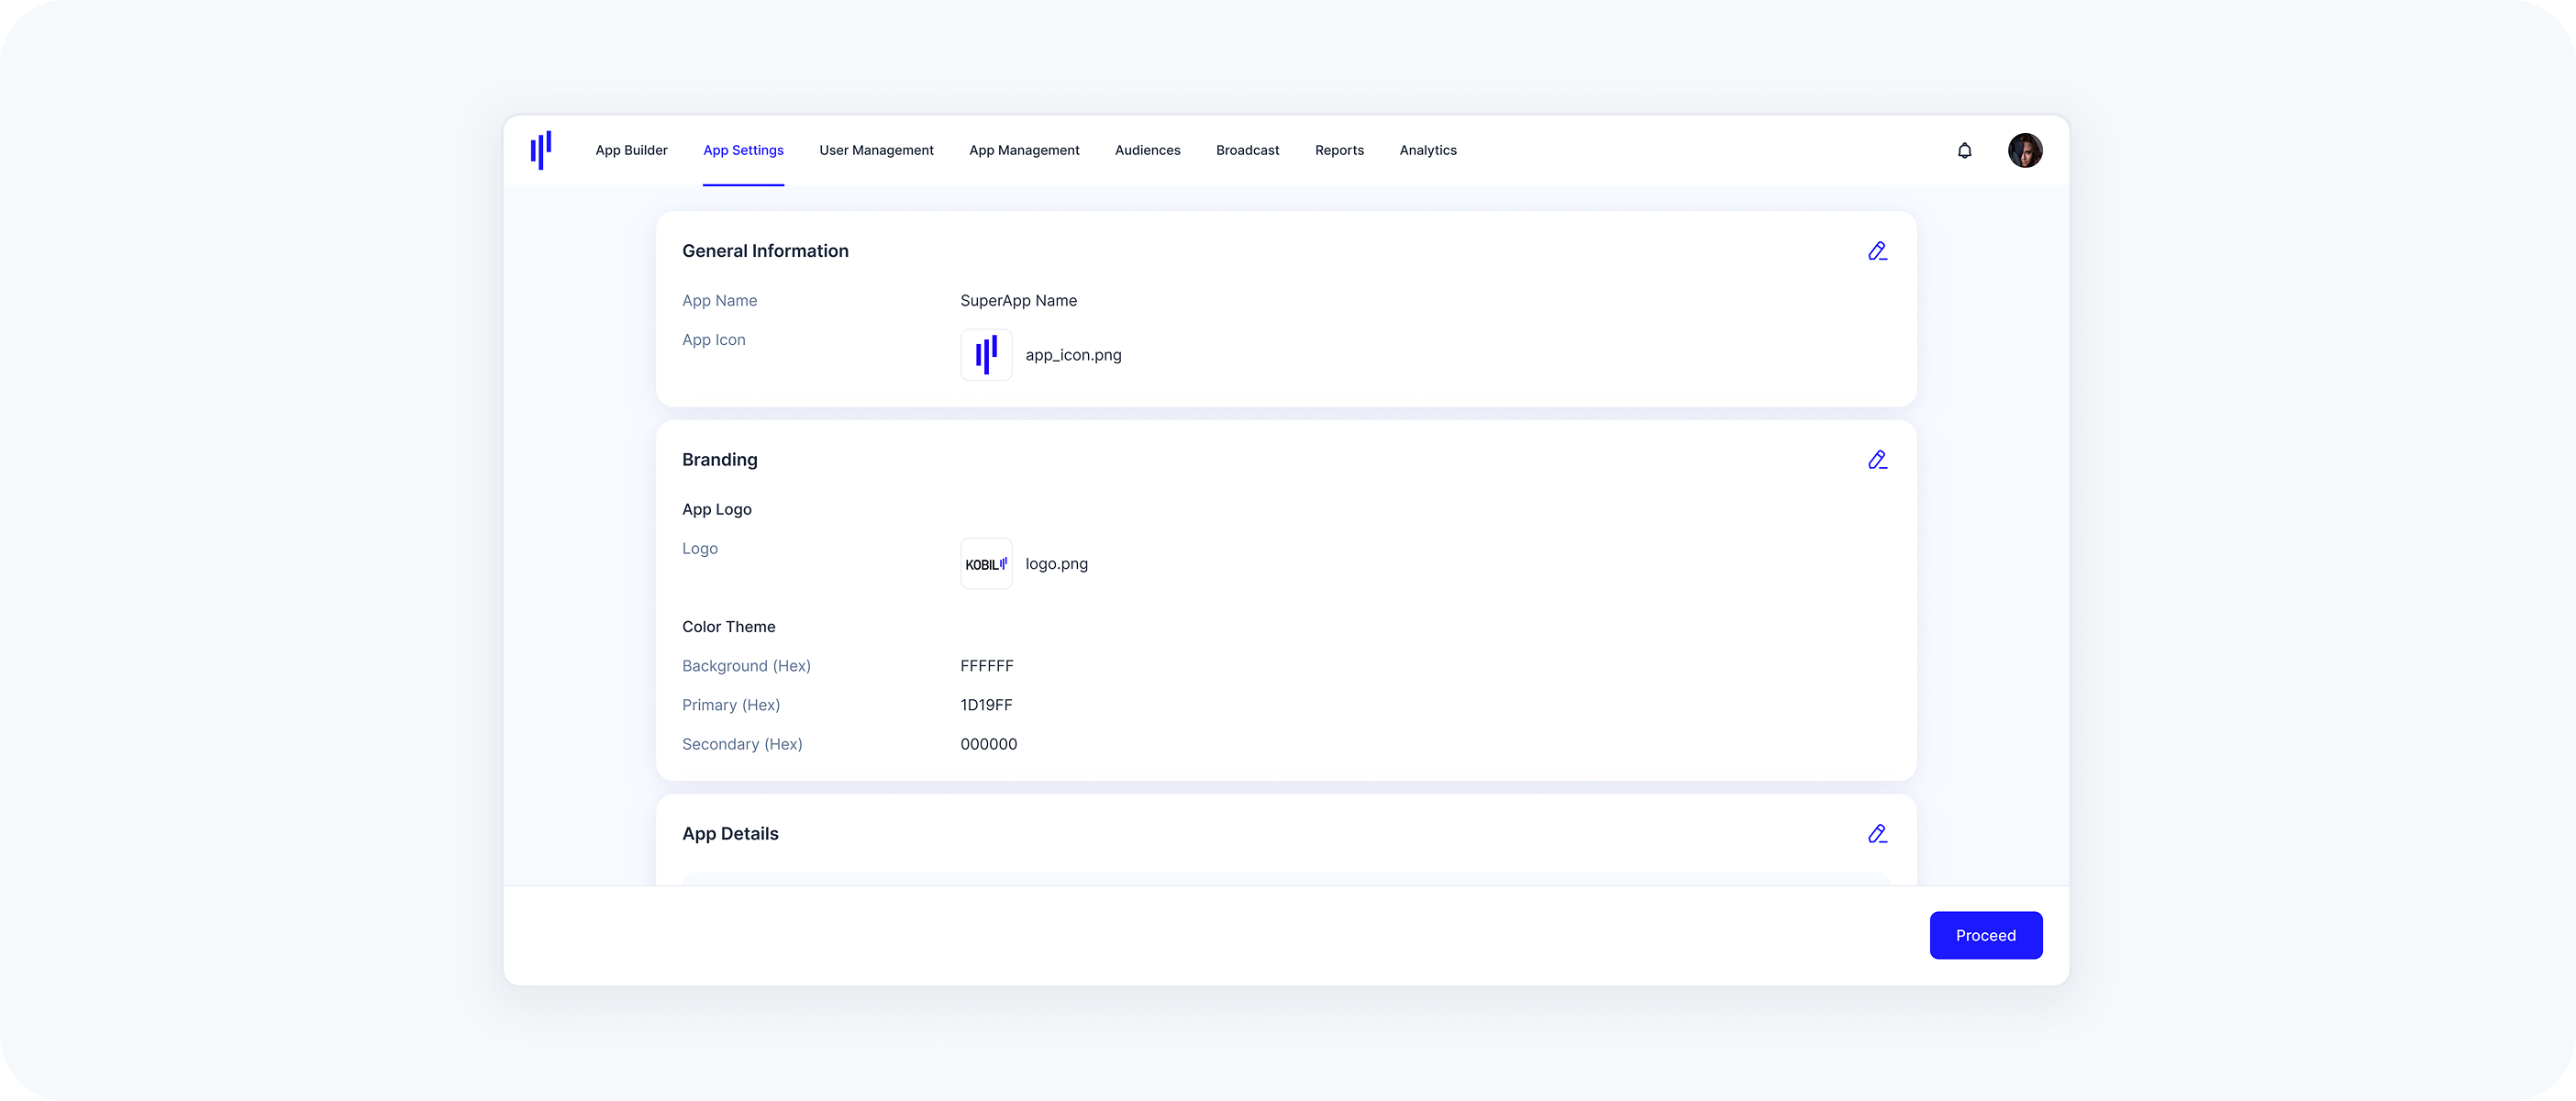
10. Review and Publish
- Review all settings on the final screen
- Click Proceed to confirm
- Click Publish App to generate your app’s initial version
Once published:
- The app becomes installable
- You can begin internal testing and move toward store release